Showing posts with label maintenance. Show all posts

Friday, December 7, 2012

Restoration Update #4

Hurricanes, Spitfires, Corsairs, Oh my!...      

            …I mentioned last week that the first order of business today would be to explain the significance of the rudder trim tab…and to save resorting to Wikipedia, embarrassing myself, and offending pilots and AM-Es alike, I will have to take one more rain check! I swear! If I don’t follow through next week send me an angry email. However, I also promised this week would be TWICE as exciting. Here’s to hoping I delivered!

            Exciting Factoid #1:

            Unfortunately this Saturday I was not working on the Hurricane (not the exciting part). Will and I were helping out Paul with the Mk. XVI Spitfire (Exciting part, in case that wasn’t obvious). We (not me, I wish) are also repairing/rebuilding/entirely completely fabricating a new pair of Mk. IX wings for our Spitfire out West! The Mk. IX graciously lent its landing gear locking pin to our Mk. XVI Spit so that it could enjoy a safe flying season! Well we finally got the locking pin back and it was time to replace/return it!


Even our airplanes share well


I wonder if the origins of the boomerang were really from a frustrated AM-E...


The “boomerang,” houses the locking pin. That’s the brass nib sticking out the right side and this is pictured above. Sadly when we tested it out, it didn’t boomerang back to us…it just flew like a brick…and made a nice hood ornament for the Cornell…oooh bad joke…(don’t hurt me!). The Mk. IX locking pin is in a brass finish. The newly returned Mk. XVI locking pin, pictured below, is finished in stainless steel. Now all we had to do was pull the old one out and put the new one in, simple…well relatively speaking. We just had to disconnect the electronics, take out the landing gear arm, take out the boomerang, disconnect more electronics, remove the old pin, line up about 4 separate bushings, channels and holes (which took equally as many people), and put the new pin in…yeah, simple!


Out with the old and in with the new...sort of


So, the very first thing we had to do was remove the landing gear (the electronics were attached to it so that was done simultaneously. Below is the port side landing gear. As you can see in the second picture, the boomerang is clearly obstructed by the landing gear. I wasn’t lying when I said it was simple, honest!


Landing gear, seems important


Simple, really


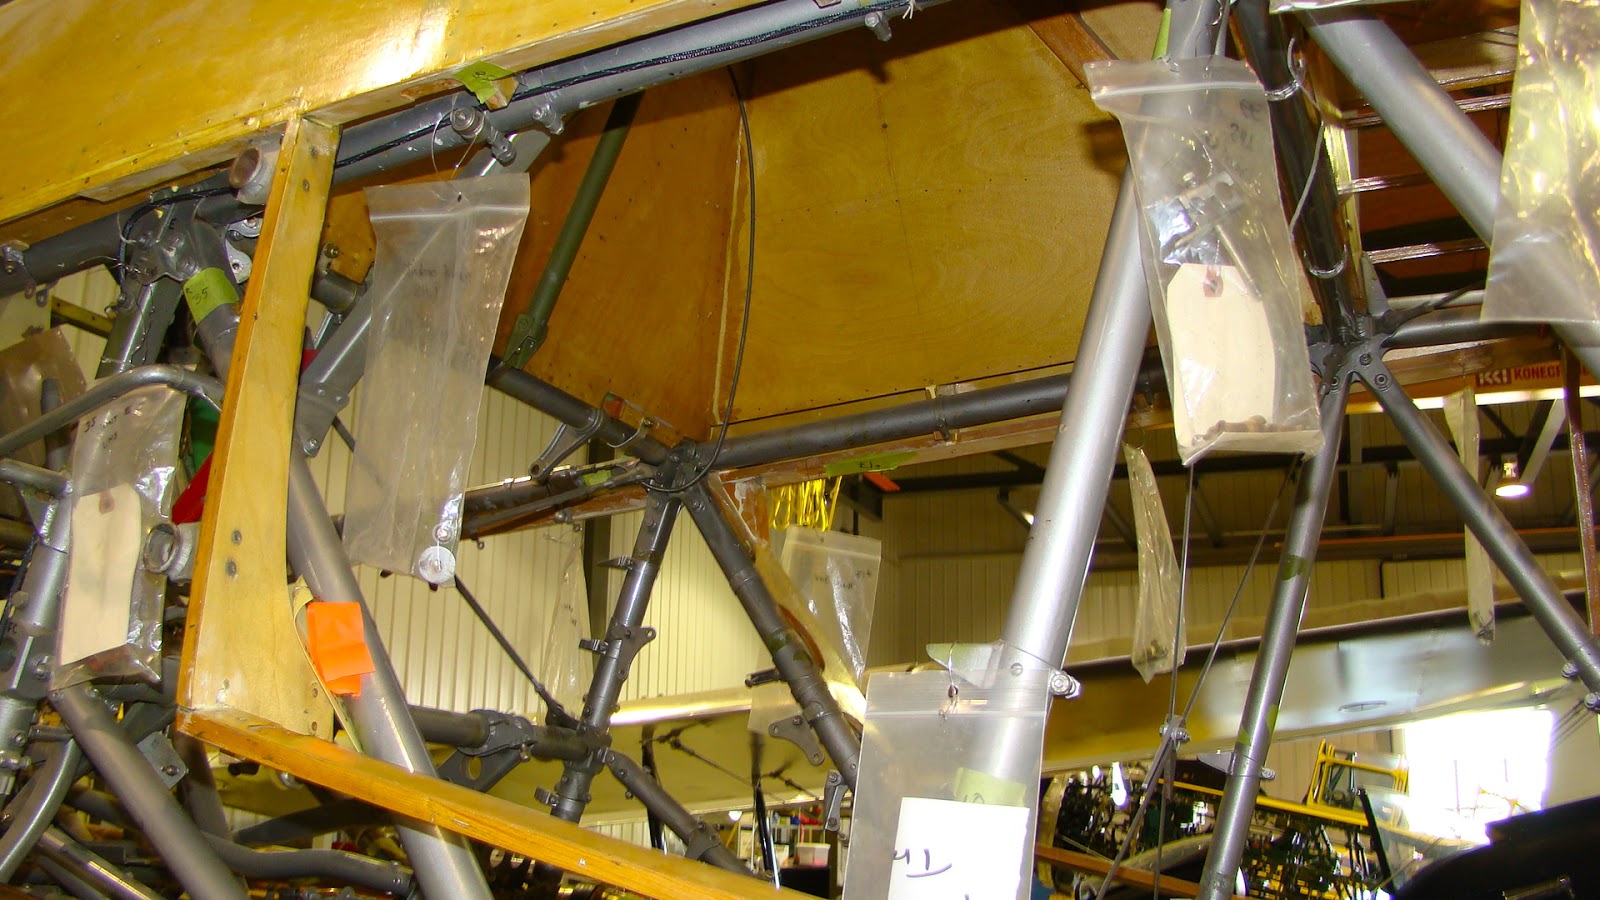
The first thing Will worked on was removing a circular shaped panel on the top of the wing while I removed a panel on the underside.


So shiny you can see your reflection


I didn’t snap a picture of the panel I removed so we will move right along. The next thing that Will had to do was remove the airbrake line from the main landing gear (that’s the black tube running down the backside of the landing gear, you can see it if you scroll up).

Then once that was down, we had to remove the cotter pin from the nut and bolt assembly holding the actuator to the landing gear (the actuator lives up to its literal name and engages the landing gear into which ever position the pilot desires, up or down). Once we did that we could remove the landing gear (or landing gear arm) from the Spit.


Looks pretty solid 


As you can see, the cotter pin and nut were removed. The cotter pin is a pin that goes through an opening in the castle nut (which looks like the parapet of a castle, Google it) and then through the hole in the bolt. Once it reaches the other side, its’ prongs are bent in opposite directions. This stops the nut from loosening over time. Once we carefully pulled that bolt out, the actuator slips out of the groove. Then Paul came over and helped us safely remove the landing gear arm.


It takes a village to maintain a 70 year old aircraft


Voila! Not even a scratch! It was only super heavy and required 3 people to remove. Sometimes it really makes you wonder how these aircraft were maintained during the war years…I guess that they weren’t expected to last as long, a rather sad reality. With the landing gear out of the way we could move on to removing the electrical bits.


The junction box - sounds like a hip jazz bar


Above is the junction box. This is responsible, if I remember correctly, for sending the appropriate information to the landing gear indicator in the cockpit. This lets the Pilot know his landing gear are down and locked and has “3 green.”  After labeling all the input wires, we could remove them (L for left, R for Right…very complicated methods at work here). We want to keep track of where they go because if they were to be reinstalled incorrectly, we’d blow a fuse when we test the landing gear. 


This is why we do not have one of those red 'That was easy' buttons on the shop floor. It rarely is.


That was easy! And that was only half the battle. After that it was just a matter or removing the boomerang and then we could begin the process of swapping out the locking pin. I didn’t get any pictures of the boomerang-locking pin being replaced and I’m kicking myself over it. It was quite the ordeal. I also forgot to mention that the pin was spring-loaded which complicated the matter thrice-fold. Well not entirely I just felt like using the word “thrice-fold”…don’t ask I have no idea why...it sounds kinda cool? Nonetheless, it took one person to hold the spring-loaded locking pin. One person to line up all the various bushings, holes, and slots, one person to hold the flashlight, and two people standing off to the side chuckling devilishly at the others seemingly vein efforts…don’t tell ‘em I said that! (Just kidding guys, I didn’t find anything amusing about your struggles).

Since I didn’t snap any pics of their struggle, I also failed to snap a pic of the completed replacement. That’ll second order of business next week (after the Trim Rudder explanation).

Exciting Factoid #2

You never know what’s going to happen when you spend a day at the Hangar. One day an aircraft goes for a surprise flight, tours come through, movie’s get filmed (unfortunately I didn’t snag the lead role), and Corsair’s get run. The last item is today’s make’s today’s blog twice as exciting. It’s just as well part of the restoration process because it’s quite distracting and distracted me from the restoration. So here are some NICE shots (If I don’t say so myself) of the Corsair being run-up.


It's cold out, but there's work to do


With the ground power connected, it was time to wind up the massive 12-foot-diameter propeller. I got to help wind it up; it also took 4 of us. Paul had the best seat in the house (the cockpit) running through his start-up checklist.


Run 'er up Paul!


Once it got going, Paul unfolded the wings, which I caught on tape (it may appear on the VW Facebook page soon, so be sure to “like” the page!). Look at that, nice capture of the rotating propeller…I have no idea how I did it, really, no idea!

After it was run for a good few minutes and all the liquids cycled through the engine it was time to put the Corsair back in the cozy hangar, and my it certainly was cozy because we packed another Jet (I’m not sure what it was called, it was big, red, and Russian, but had US markings on it…) and an RV-8 in leaving just about 1’(foot) clearance to close the doors.


Back into the warm, tightly packed hangar. All in a days work.


Also, it was REALLY cold today…needless to say I was ready for a warm up coffee and a moment to make sure I had all my fingers still.

Well I hope I delivered with the twice as exciting bit. Working on the restoration team means helping out on all the restoration projects. It was quite exciting (for me, and Will I’m sure) to help Paul out on an air-worthy aircraft and the Mk. IX wings. Hopefully next week we will be helping re-install that landing gear arm. If I help out on that you’ll be sure to hear about it!

Take care and see you next week,

Chris

P.S. (to myself) learn about rudder trim, learn about rudder trim…no excuses now.

Wednesday, November 28, 2012

Restoration Update #3


'A good puzzle, it's a fair thing. Nobody is lying. It's very clear, and the problem depends just on you'....[and a Mk. IV Hurricane]
                        – Erno Rubik

            Last week I mentioned that restoring vintage aircraft is often immensely puzzling and even more so when that puzzle lacks a picture. Well this week we certainly lacked the pictures we needed. We had to figure out how the tail section was mounted, whether it was mounted correctly, and how the rudder trim cables were to be assembled. I can vouch only for the last unfortunately. This week was quite hectic and before we dive into restoration process I have an important announcement.

            This Monday, November 26th, 2012, “Gear Up – Vintage Gear Store” will be opening a boutique at Place d’Orleans shopping centre. Just in time for the holidays! What would be cooler than to don some awesome Vintage Wings of Canada swag and share some Canadian history. You can even get a wonderful 242 sqdn. Willie McKnight Hurricane Tee. Sales go to helping us put this wonderful airplane back in the skies!

Annie and I loaded up the Vintage Wings swag wagon (to the brim!) with excellent gear! If you can’t make it to Place d’Orleans (Orleans/Ottawa), you can visit us at C-YOW (The Ottawa International Airport) or Online!

Here’s an example of what will be available at the booth!


Aside from restoring the Hurricane, I also work at the store and thought I’d let you know!

            Now on to the business of today...So I mentioned we had no pictures. Well, I lied…. We had a shining example; however, it came with no written instructions. Meet the tail section of our Mk. XII Hurricane. We wanted to see if we had the mountings correct, which I believe we did! (We just have to uninstall it now for painting).


Now that's a nice piece of tail! 


            The one task I took part in today was trying to figure out how the rudder/trim cables were to be installed. Below are the trim cables for the rudder. You might note that they are crisscrossed. Well, according to the one piece of written reference we had today, that’s how they are supposed to be.


Criscrossed trim cables make the rudder jump, jump


Now that’s only a small part and one side of the Rudder trim assembly. It turns out the grass wasn’t so green on the other side. In order to understand how it went together properly and the cables connected, we had to look at our Mk. IV Hurricane.


Always nice to have an example to model after


The trim cables (coming from the rudder) are to plug into the pivoting bracket-like part, which is directly in the centre of the above picture. 


Slow and steady wins the race


A chain is attached to the sprocket in the picture above, which is then attached to another bracket (not in the picture) where the cables from the trim wheel (up in the cockpit) join. Now in order to figure all that out, we opened up the Mk. IV, a process that took about 8.5 times longer than originally predicted. The U-Shaped panel around the elevator was most displeased with us and gave much protest.


Sorry Mr. Rubik, the only answer to this puzzle was the “Bunny” McLarty Hurricane


We are starting a drive to get Chris a new camera for x-mas


My ingenious way of side-stepping the terrible non-working flash on my camera was to shoot in Auto mode while holding a flashlight awkwardly towards the rudder trim assembly. As you can see, it looks exactly like the Mk. XII assembly. You see the sprocket and behind the sprocket, you can see the bracket that receives the cables coming from the trim tab on the rudder. So now that we knew how the assembly went together we could look for all the necessary parts to install on the Mk. XII. The important thing with restorations is that you cannot do anything without a reference. You either need written reference, diagrams, photographs, or an actual example. This stops one from simply attaching any piece wherever you fancy. It also upholds a level of quality and safety. Every part needs to be properly attached and secured. That’s not something you want to throw an educated guess at. We however are fortunate to have a living example 10 feet from the Mk. XII ready to answer any question we have.

The last thing I did today I have no pictures for. However, it will make future blogs better. Along with some other volunteers, I was shown how to find part names, part numbers, and their respective locations on the aircraft (so-to-speak). There are fairly complete drawings and labeling of parts divided into a few books. Once you find a part in the book, which has a number beside it, you can use this number look it up in the computer (which there is a PDF of all the part numbers). From there you can find the actual part number and in some cases you can end up figuring out where it goes because there is a detailed description beside it. 

From now on I have no excuses for saying, “I should really know what that part is called” or “that sprocket thingy attaches to this bracket thingy” and so on. Feel free to call me out on future blogs! I also got to see an in depth look at all the paper work that goes into a restoration, such as log books, work-orders, etc. I will save those for another day, perhaps when a new work-order is opened up on a particular part of the aircraft.

My apologies for the rather short blog today but I was not around for a good portion of the work that was completed today. However, I promise next week’s will be twice as exciting! I will also make sure to explain the significance of the rudder trim tab. Right now my knowledge is rather lacking, so that will be the first order of business next week.

Take care,

Chris

Tuesday, November 20, 2012

Restoration Update #2


Oh the Spitfire…

It’s funny…last week I mentioned that the Spitfire often overshadowed the Hurricane. Now I am not sure if you noticed or not (maybe you did, congratulations, you picked it up before I did!) but I ended that update having been distracted by the Spitfire…so much so that I forgot to take a picture of the installed oil filter and instead gave you two awesome pictures of the Spitfire. Oh the irony! So now, as promised, here is a picture of the installed oil filter!


One job done, 99,000 to go!


As you can see, the intake and outtake pipes have been fitted as well! Now just before we get underway with the various happenings of today, I would like to direct your attention to two things. First, after digging through the MASSIVE archive of the most excellent weekly newsletters (which you should sign up for if you haven’t – Vintage News - use the subject line 'Sign Me Up for Free Vintage News), I found one regarding the restorations at Vintage Wings of Canada. There are actually a few restoration projects underway so this article will provide you with a nice bit of info on the other projects! Now, I knew this I just didn’t mention it last week and I should have, so I’ll let this article do the talking.

Here’s the link:


^^Here^^ you’ll see the various projects underway, which include building a pair of Mk IX Spitfire Wings, the transport of the de Havilland Fox Moth from the Ottawa International Airport to the Hangar, some brake work that needs to be done on our Westland Lysander, and finally our XII Hurricane. There you will see the Hurry with her wings attached and get to meet some of the other members of the team! Be sure to check it out.

The second and last thing (I swear!) I wanted to draw your attention too is the dedication program at Vintage Wings of Canada. Every plane operated in our fleet is dedicated to a Canadian pilot who operated that aircraft...we do this to honour not only their service, but their courage, leadership, and sacrifice. We want to do more than just preserve these machines; we want to preserve the legacies of the men who flew them. The real stories lie not in the aircraft, but with the men who flew them. So in order to do that and honour such great Canadians, we dedicate each aircraft to a pilot. Our Mk. XII Hurricane will be dedicated to Flying Officer William Lidstone McKnight, DFC and Bar.  I have attached another newsletter (which I should have last week). This newsletter will tell you, in far greater and better detail than I’ve expressed above, all about our dedication program and every aircraft dedication in the Vintage Wings fleet. It is the stories like those of William McKnight that truly make the restoration worthwhile.


And now, the time has come! Let’s get down to business.

Today was a day where many things were attempted but then promptly left for later. The thing with aircraft restoration is that it’s like building a puzzle without the box. Not only do you often have little idea as to how things should be, most of the time (unless there was extensive documentation), you just don’t know how things once were (except from the guesses you have made from fitting pieces together, hence a puzzle). Now rather than run through everything that was done today, I will show you the two tasks that highlight this and that I took part in. The first involved making room for two. The second involved installing guides for the rudder and elevator cables.

That’s right, the first thing I did today along side Annie Carreau, was make room for a second seat in the Hurricane! Whaaa….TWO? Yes, two. We are exploring the possibility of the Mk.XII Hurricane to have two seats in her, for sponsored flights! There is still a lot to be done in order to make a space for a second seat, but today we had to remove some crosswire/bar supports under the ‘dog kennel.’


Surprisingly, none of the hangar dogs were hanging at the 'dog kennel'


Pictured above, you can see the crosswire/bar support underneath the kennel and the support running about a 45 degree angle towards the Pilot’s seat (pictured below) 


Best seat in the house


In the middle of each you can see a bracket/support (I really need to learn the names of these things) anchoring the two crossing bars together. The first thing we had to do was remove this piece. Then after we removed those, we could loosen up the bars and remove them. Now it was more trouble than you’d think to remove these bars because from the way it looked, those supports were put in place before the kennel (the big plywood structure on top). Anyways, after about an hour, all the supports were removed and the process of making space for two well underway! From the looks, it's certainly going to be cozy in there!


And you thought it was cramped on your last Air Canada flight


Moving along, the second task involved running some new rudder cables and attempting to install a track/guide for said cables. Now my camera (and photography skills) is not the best so you will have to suffice with the attempted assembly of the guides. I don’t know if it was the light or what, but the camera either focuses and the flash doesn’t work or it sets the flash off and all you're left with is a photo only suitable for a 60’s psychedelic rock album cover.

So that aside, here is what I could photograph!


'The Track Guide' was one of the lesser known Pink Floyd albums


Wow! All the cables run, good job Chris! Well done! … oh that was but the dream, this is actually my guide picture from our Mk. IV Hurricane. I suppose the measurements gave it away (damn). Looks simple eh?...no. As you can see the cables running through the very left and very right guides (the red wooden shapes) house the rudder cables. The piece in the middle houses the elevator cables, the two circular shaped ones house a trim tab (I believe from the elevator). It’s actually called port and starboard, but for the purposes of this picture, left and right suffice. I also had to install that whole bracket assembly and that didn’t go as well as I had hoped. Anyway this is where I made it to!


Port or Starboard?


Not bad eh? Looks just like it! Then I realized that I needed some nuts and bolts to mount the bracket. After a quick lesson from Paul Tremblay, the man in charge, I was set on my way!


The 'plain grip' seems anything but


The British bolts we are using here are called “A25.” In order to figure out what size you need, you need to measure the distance of the material you are putting the bolt through. This determines your “plain grip” distance. The “plain grip” is the non-threaded portion of the bolt. Now British bolts are measured in 10ths of an inch (figure that one out!) and we determined I needed a bolt with 2/10’s of an inch “plain grip.” Then to figure out the size of bolt, there is a corresponding letter. I needed ¼ inch (if I remember correctly) and that ended up being a letter “C” (more like C for Chris…). So in the end I used A25-2C bolts. To add, we can only use “documented” hardware on the aircraft, so that means I had to sign these out of the inventory. Now, if anyone ever wondered where eight A25-2C bolts, washers, and nuts were on the Hurricane, they would be able to find out that they were holding the rear Rudder/Elevator guide assembly in place! All that for a couple nuts and bolts! Not quite as easy as going to Canadian Tire!


Things don't always line up the first time around, but with a little persistence and much determination they eventually will


Ta Da! Installed...well not really. Unfortunately, the center and far right (according to the picture) holes do not line up with their brackets. This will have to be revisited next week and a little TLC given to make it work and make it right.


Each new cable gets its own label


So to finish off the day, I labeled off the cables that I had run. The rudder cables consist of 8 cables (4 per side) that connect just behind where the second seat is going. Rather than attach them together, I labeled them off because they will eventually have to be fed through the guide assembly once it is installed. Now if anyone else works on this they will hopefully understand my tags and know what to do!

Today was a busy day. It was immensely puzzling at times (but in a fun manner, working on a Hurricane is never not fun) but while it doesn’t seem like much was accomplished, a lot was. We figured out a number of things that need to be addressed, parts that have to be modified, and spaces that need to be engineered. Such is the process of warbird restoration; Fix one issue, find 10 others. But, if you recall the Tortoise and the Hare from your childhood, slow and steady truly gets it done. Well that’s all I’ve got for today, we’ll see you next week! Thanks!

Chris